
Cute Cardboard Crafts To Update Your Farmhouse Decor

For the most part, cardboard crafts usually don’t fall under the home decor category, and it’s simple to understand why.
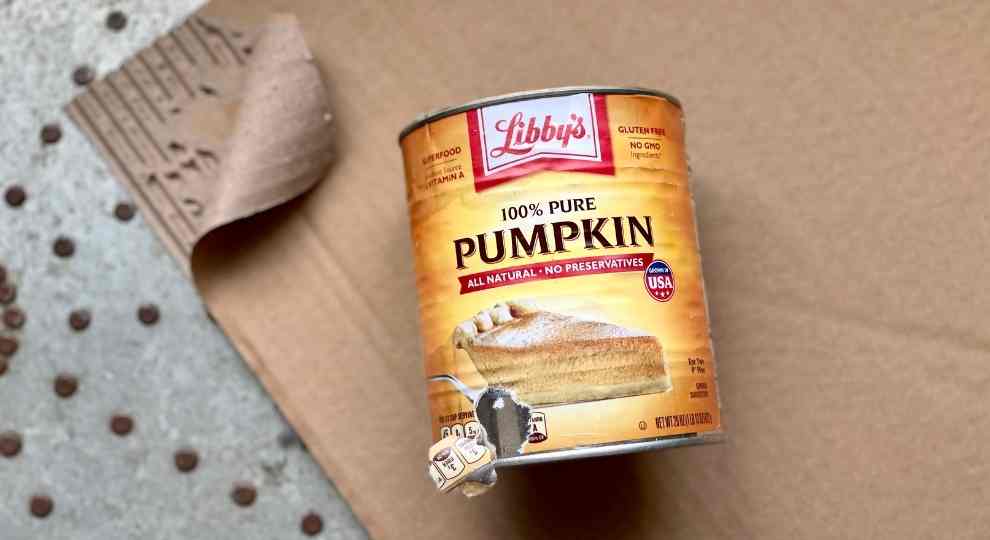
Cardboard is flimsy and unattractive. Therefore, we will use a metal can for our structure, which can be used as a vase, pencil holder, or storage for small items.
Next, we will peel the cardboard to reveal its decorative texture. That’s right; we’ll be upcycling your leftover metal cans and tearing up a few Amazon boxes in the process.
This site uses ads and affiliate content as an Amazon associate earning on qualifying purchases. Disclosure.
Why did I try this crazy craft idea? Several weeks ago, I was invited to submit content to one of my favorite food networks, and as I’ve been baking, my metal cans have been piling up. I kept on thinking – there has to be a way to upcycle these cans artistically – BINGO.
Besides, I love an easy DIY project, especially a frugal one at that!
Gathering Your Supplies For Your Future Cardboard Crafts
Although I will be guiding you through my process, which you can follow 100%, I’d rather inspire you instead.
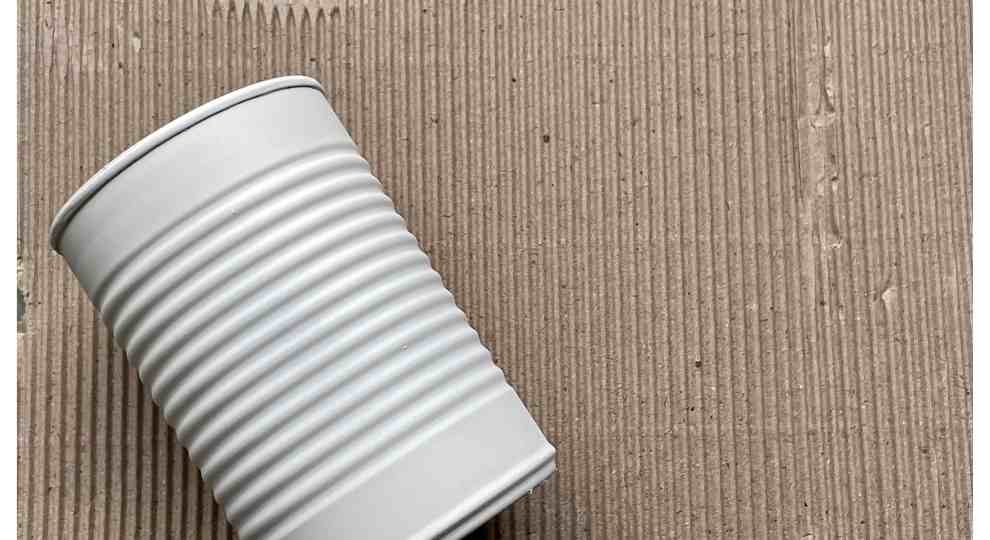
Below is a photo of a cardboard wrapper I found yesterday. Notice the corrugation has a less ridged look than what is typically found. Cardboard is found not only in boxes but also in packaging, and if you have this future project in mind, you will be amazed at the supplies, you will gather along the way.
| Supplies Needed |
|---|
| Cardboard |
| Metal Food Cans |
| Glue Gun or Tacky Glue |
| Scissors |
| Paint |
| Mod Podge |
| Brushes |
Ideas To Keep In Mind While Choosing Your Paint Colors
If you use metallic silver paint, the corrugation of cardboard can take the appearance of faux galvanized zinc. To create this look, you would use metallic silver paint as a base and different shades of gray to give it some definition.
PRO TIP: Use white and black craft paint to create your shades of gray. Adjust it as needed to create different shades, which helps give an aged appearance.
Unfortunately, I had no metallic silver in my crafting supplies and a ton of other colors to work with. Note to self – add metallic silver to my wish list.
Let’s begin…
STEP 1: PREP
If you have a difficult time removing the paper wrapper from the cans, use hot water or run them through the dishwasher.
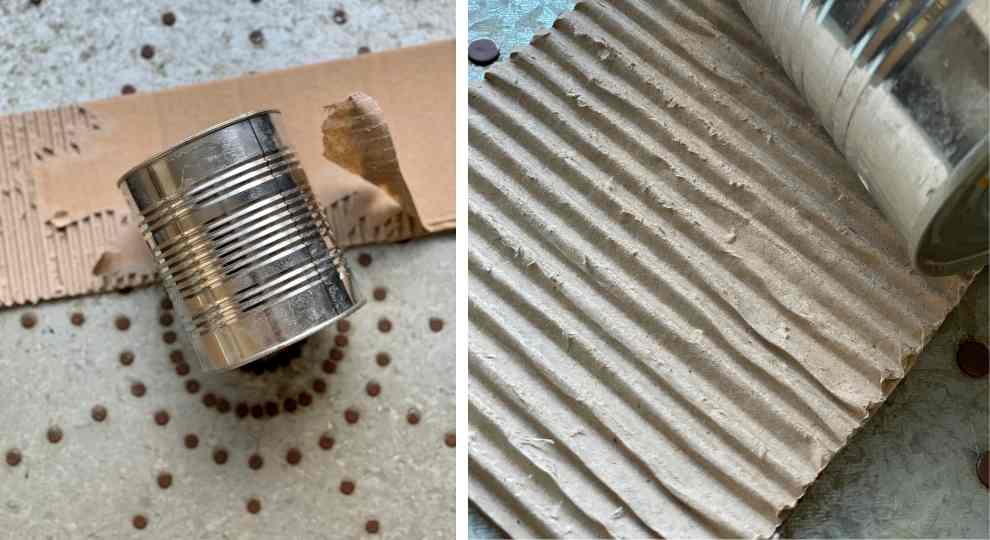
Next, peel one side of the cardboard paper off. Admittingly this process could be time-consuming since the paper can leave a bunch of little pieces behind.
To speed this process along, use a rag soaked in water to dab the side you want to peel off.
STEP 2: MEASURE
Measure and cut your cardboard by using a pencil and ruler to draw a straight line before cutting.
Once you’re happy with your sizing, apply one glue line and tack on your cardboard to the metal can. Continue using more glue as you wrap the remaining cardboard, pressing down firmly to make sure it adheres.
In case your cardboard is a bit short, use a line of glue to fill in the gap. Don’t worry about it being visible since it will be painted. I speak from experience here – I don’t have the patience to precut all my cardboard crafts.
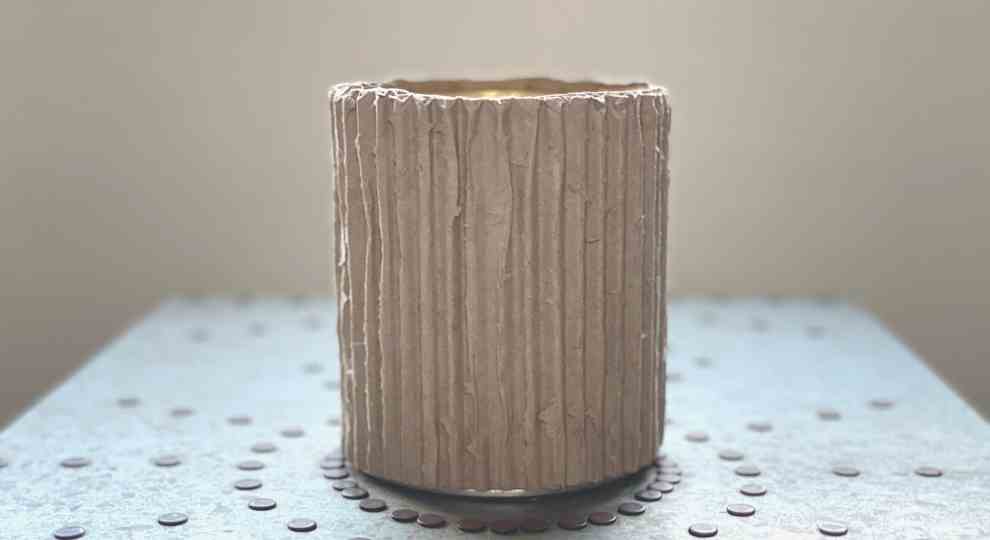
If you like the natural look of the cardboard, you can stop the project at this point. I still recommend applying a layer of mod podge to protect the project and give it some durability.
STEP 3: Paint Your Cardboard Crafts
To speed up your process, you can use spray paint instead of craft paint. Once the base layer dries, I only use acrylic paint and apply it with a dry brush.
This is the time to bring out your inner artist so take a few minutes to envision what you would like your end result to look like before beginning.
PRO TIP: Acrylic paint can be removed by using water. If you feel you were heavy-handed, dip your brush in water and remove some paint.
STEP 4: Add A Layer Of Mod Podge
Mod Podge has become a staple in most of my projects due to its ease of use. Not only does it give cardboard crafts a finished look; it also protects the longevity of your project.
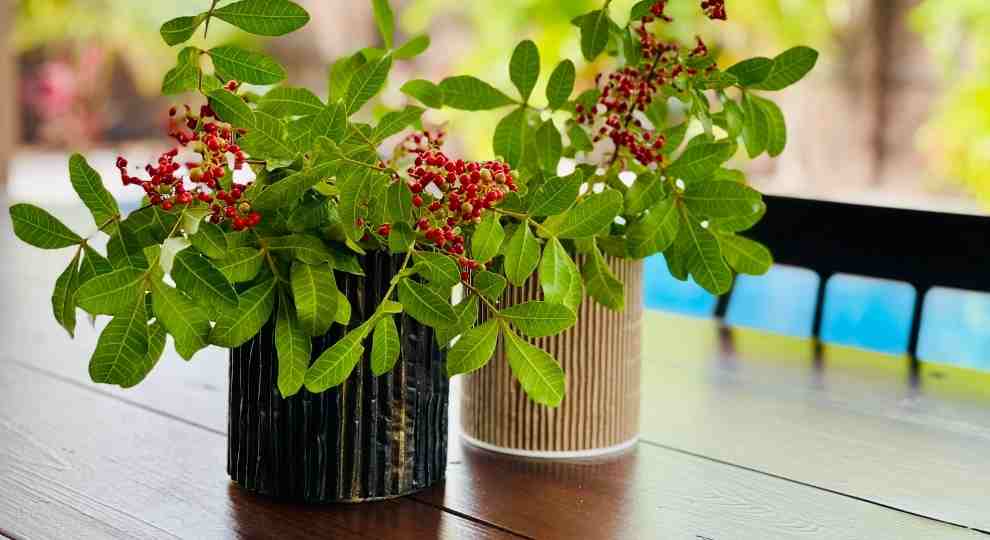
Additional Ideas For Your Metal Cans
It’s truly incredible what you can do with tin cans and a few scrap pieces of cardboard. You may even be inclined to purchase large metal cans for larger projects.
Making a few jars of homemade tomato sauce is always a good idea.
For year-round decor, simply update your display by adding greenery or floral arrangements that are in season. Lastly, besides cardboard, you can cover the cans with scrap paper or fabric. One of my favorite ways to display them is as centerpieces for dinner parties. You can even fill them with herbs to be gifted to your friends once the party is over.
In Conclusion
Let’s think outside of the box (haha). Cardboard crafts are a great and frugal way to decorate your home. For more home-related styling tips and tricks, stop by the blog anytime, and follow us here!


This looks like fun. I will unleash my earth-loving inner artist very soon. ?