How To Make A Paper Bow Tie and Ribbons For Gifts | Template Included

Adding a unique and homemade paper ribbon to your gifts can add that special personal touch to your presents. These days most of us shop online, and unfortunately, purchasing one ribbon at a time is usually never an option during our checkout process.
Besides, making your own ribbons and bows is incredibly easy and super inexpensive! Who doesn’t like that, HA (-:
Plus, once you learn how to create paper ribbons, you can also use them for decorating parties, homemade cards, or other craft items.
This site uses ads and affiliate content as an Amazon associate earning on qualifying purchases. Disclosure.
I’ll be teaching you three different types of techniques below.
Pro Tip: To add more interest or “lux” to your designs, purchase a scrapbook collection bundle. You can usually buy bundles on Amazon for the same SALE price as the craft stores.
My personal favorite collections are by Bundle of Joy, and I usually pick up my books for around $9-12 each. You can view The Bundle of Joy Collection of them HERE.
The Bow Tie Is My Personal Favorite {Paper Ribbon Template Included}
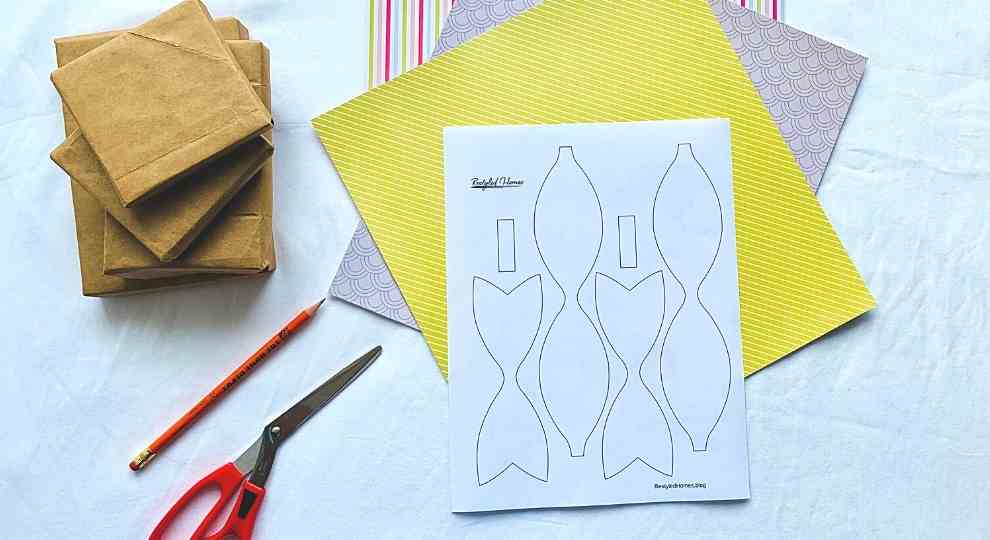
Begin by printing out your template and gathering the supplies below. To ensure your paper bow matches mine I’ve included my template for you, which will be emailed to you.
Once received, print the PDF and cut out the shapes to use them as your templates.
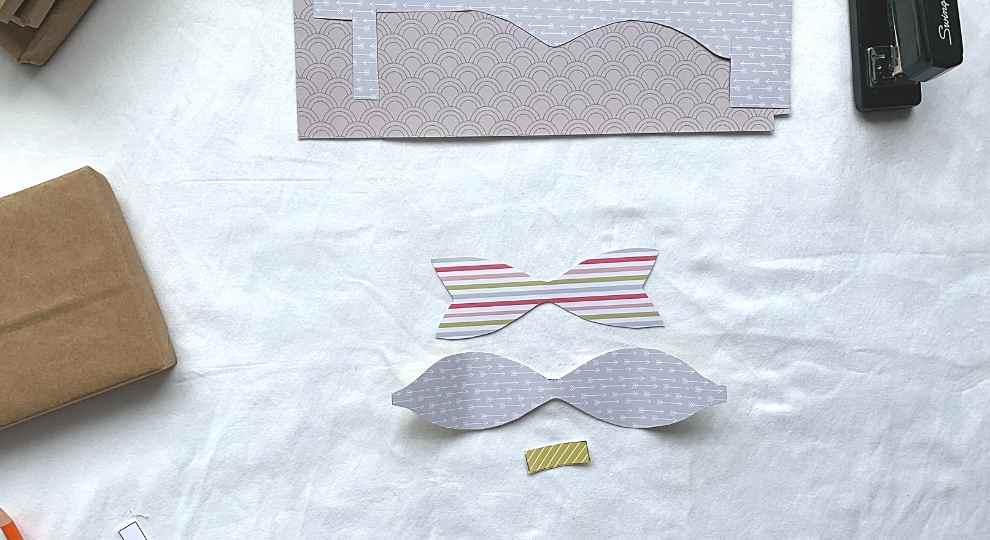
The template has a total of three parts: the mustache shape, which will make the loops. A bow-tie paper shape for the ribbon, a small skinny rectangle that will hide imperfections and give it that finish appearance.
| Supplies: |
|---|
| Printer |
| Paper Bow Template – Submit Your Email Above To Receive The Template. |
| Scrapbook Paper (See my suggestions above) |
| Pencil |
| Scissors or Paper Trimmer |
| Glue Dots or Double-Sided Tape |
STEP 1
Cut the shapes out from your template. Then place each template over your scrapbook or cardstock paper, and use your scissors to cut out the shapes.
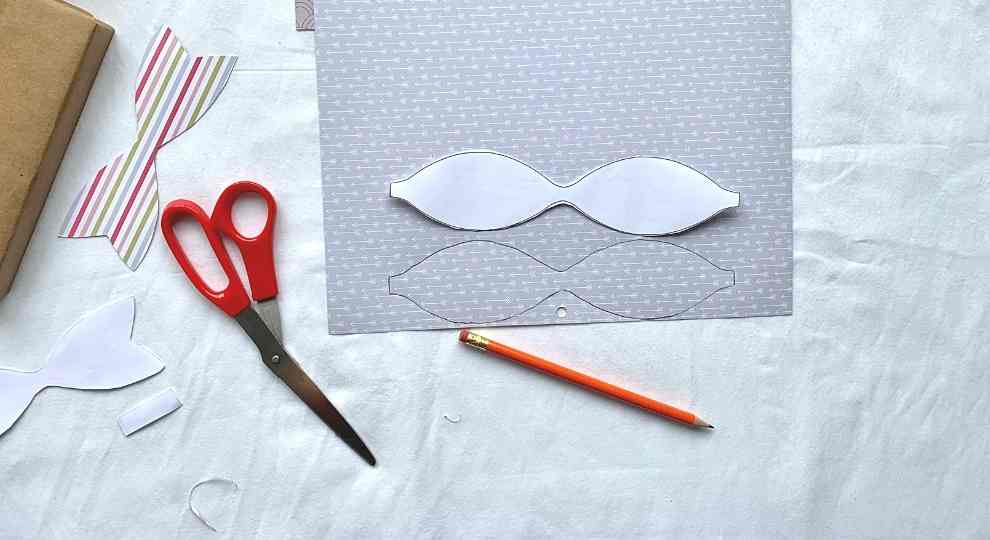
You’ll want to cut inside the lines to avoid seeing any pencil marks.
I found Tacky Glue to be the easiest when assembling cardstock paper. However, you could use a mini stapler, double-sided tape, or glue dots.
Review The Paper Bow Video Tutorial Below
- With the paper’s blank side facing upward, loop both ends of the mustache paper shape to the middle and glue.
- Place the looped bow on top of the middle of the bow-tie paper shape and glue together.
- Place the small rectangle piece in the middle of the bow.
How To Make A Paper Gift Bow
Similar to the paper accordion below, a lighter weight paper will work best. For this tutorial, I will be using wrapping paper.
| Supplies: |
|---|
| Paper |
| Scissors or Paper Trimmer |
| Glue, Glue Dots, or Double-Sided Tape |
STEP 1
Cut your paper to the following sizes:
- Three large strips that are 1 x 11 1⁄2
- Three medium strips that are 1 x 10 1⁄2″
- Three small strips that are 1 x 9 1⁄2
- One tiny strip that is 1 x 3 1⁄2 inches
STEP 2
Bring the ends of each strip together by twisting and forming the number eight, then staple or glue in place. For the tiny stripe, create a circle.
STEP 3
Begin by assembling each group and stack them together to form an asterisk or star, as shown in the video. To secure each group, use a stapler or glue.
STEP 4
Place the circle loop in the center to finish your paper bow.
The Accordion Paper Bow {Super Easy}
You can use a lighter weight paper such as wrapping paper or even white computer paper for this paper ribbon. If you plan on using plain paper, consider giving it a mini-makeover by adding some glitter or dye.
In other words, jazz it up!
I prefer not to cut the paper to size since it can be trimmed to the desired length after creating the bow.
| Supplies: |
|---|
| Paper |
| Scissors or Paper Trimmer |
| String or Stapler |
| Glue or Glue Dots |
- Fold the paper to create a paper fan. Continue folding and flipping the paper until you reach the end of your paper.
- Fold the paper fan in half and use a stapler or string to fasten the middle.
- Wrap a skinny strip of paper around the middle and adhere with glue, if desired.

In Conclusion
Well, there you have it! Creating a DIY Paper Bow can take an ordinary present into an extraordinary gift. If you need some cute gift ideas, check our shop or try creating a few DIY presents such as our marble mugs.