Learn Exactly How To Make A Custom Shower Curtain Without Sewing
If you’re on the hunt for a custom shower curtain, be ready to dish out some serious moola! And after seeing the price of fabric these days, I understand why. Plus, not everyone owns or enjoys sewing.
All of us can paint, especially if we are given a stencil, which will produce a professional and flawless result. Besides, acrylic fabric paint comes in a rainbow of colors, so the sky is your limit.
Also, you could reuse the stencil over and over again. Think of the possibilities…custom towels, bathmats. I know, I know…it’s all very exciting!
This site uses ads and affiliate content as an Amazon associate earning on qualifying purchases. Disclosure.
What Kind Of Fabric Should You Use For A Custom Shower Curtain?
It’s best to use natural fibers like linen or cotton. Be mindful that the tighter the weave of the fabric, the easier it will be to paint.
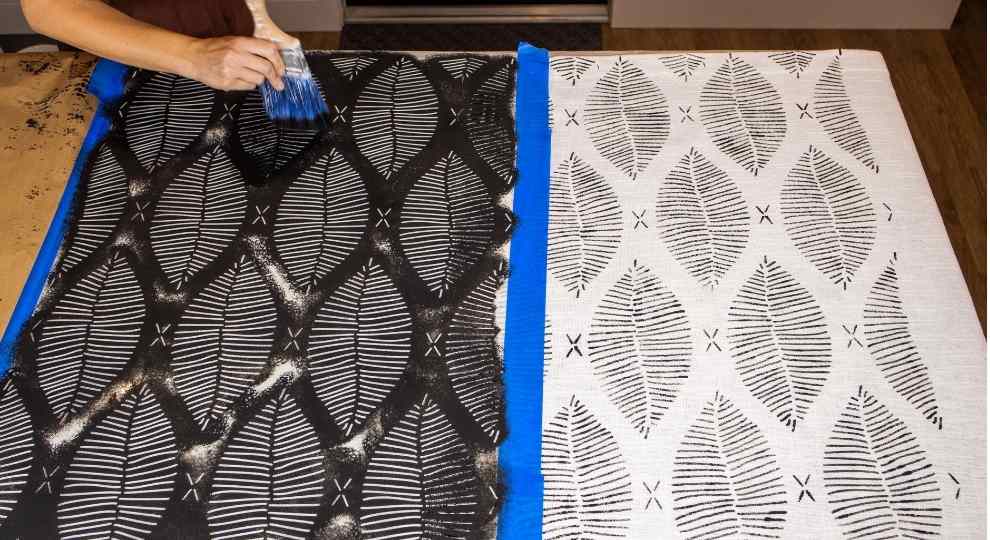
However, I enjoy a very organic look, so I decided to use a loose weave fabric. The stencil I will use today is a minimalist leaves pattern.
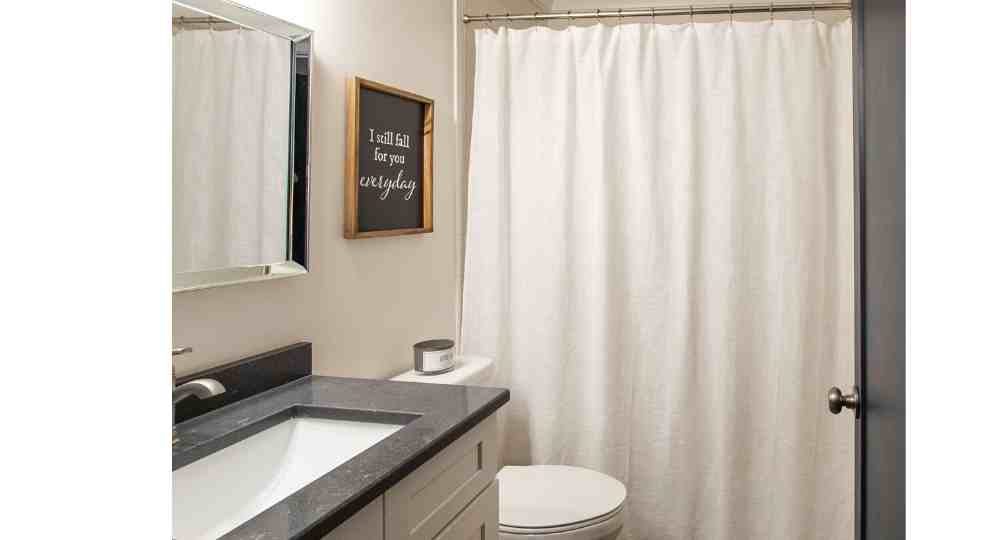
As you can clearly see, my bathroom shower curtain could use a little “mini makeover.” In its current state, it looks a bit blah.
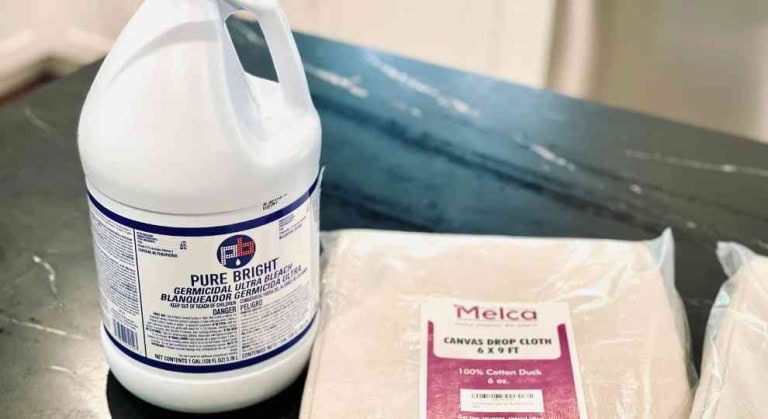
| Supplies Used In This Tutorial With Clickable Links To My Resources |
|---|
| Woven Shower Curtain Used In Tutorial Is No Longer Available (It was purchased at Target) |
| Additional Shower Curtain Options From Amazon That Come In Multiple Lengths |
| Hand Drawn Leaves Pattern Stencil |
| Acrylic Fabric Paint |
| Parchment Paper |
| Iron |
For me, custom means something handcrafted, and some imperfections are what makes the designs so unique. In other words, that’s what makes it different and not cookie-cutter, in my humble opinion.
Therefore, I used different amounts of pressure when applying my paint. If you prefer a crisp design, I would recommend the following.
First, since loose weave fabrics can be tricky to work with, try ironing on freezer paper to give it stability. The freezer paper can be easily removed from the material without leaving any signs of residue.
Also, use spray adhesive on the back of your stencil, which you will be able to reposition throughout your project.
Remember, if you get paint on an area of the fabric, the design could be ruined.
Truth be told, not all stencils are created equal. But I really like these ones. It was easy to work and was more sturdy than other stencils I’ve used in the past.
How To Stencil Your Custom Shower Curtain
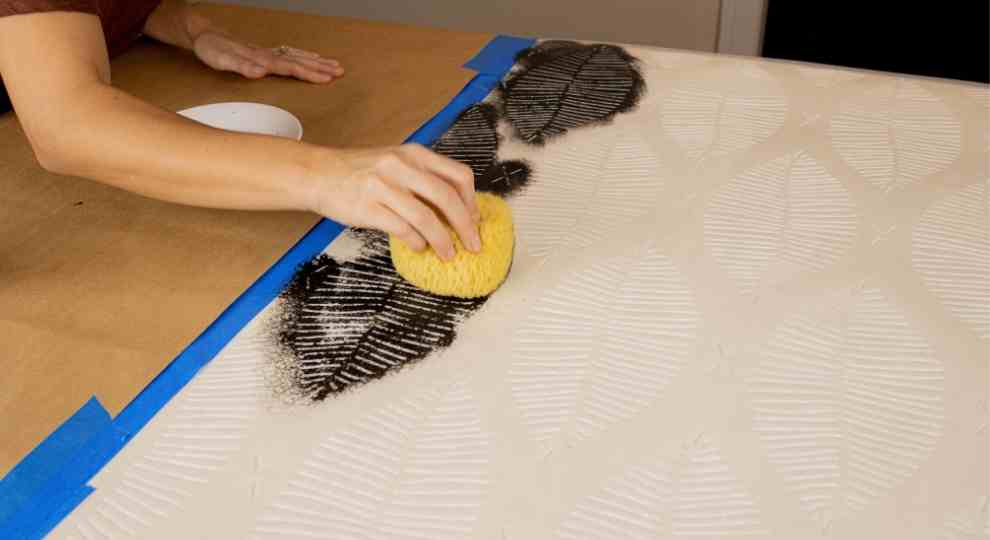
Begin by placing the shower curtain on a flat and hard surface. Use a drop cloth or contractor’s paper to protect your surface. To ensure the best design I recommend placing the stencil in the center of your shower curtain and securing it with painter’s tape.
DO NOT RUSH THE PAINTING PROCESS
The fabric will soak up paint, so plan on working in layers. If you add too much paint for your first layer, it will bleed into the fabric.
PRO TIP: The key is to apply a light coat and allow a few minutes for the paint to dry. This will seal the paint and give your custom shower curtain a professional appearance.
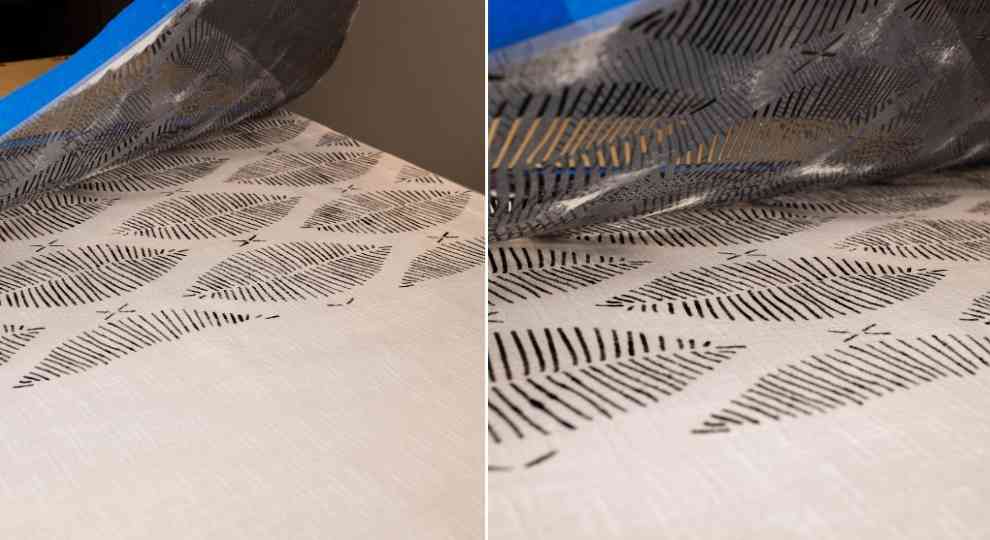
How To Remove Your Stencil
Carefully peel back the stencil onto the protective contractor’s paper and make sure the stencil is completely dry before relocating it to a different area of the fabric.
Acrylic paint dries within a few minutes.
Reposition Your Stencil
You’ll find some repeated patterns are pretty straightforward. The pattern lined up quickly and overlapped into the previously painted area without any issues.
As I continued the project, I found a brush was my favorite tool of choice. However, I still used a sponge near the edges of the stencil.
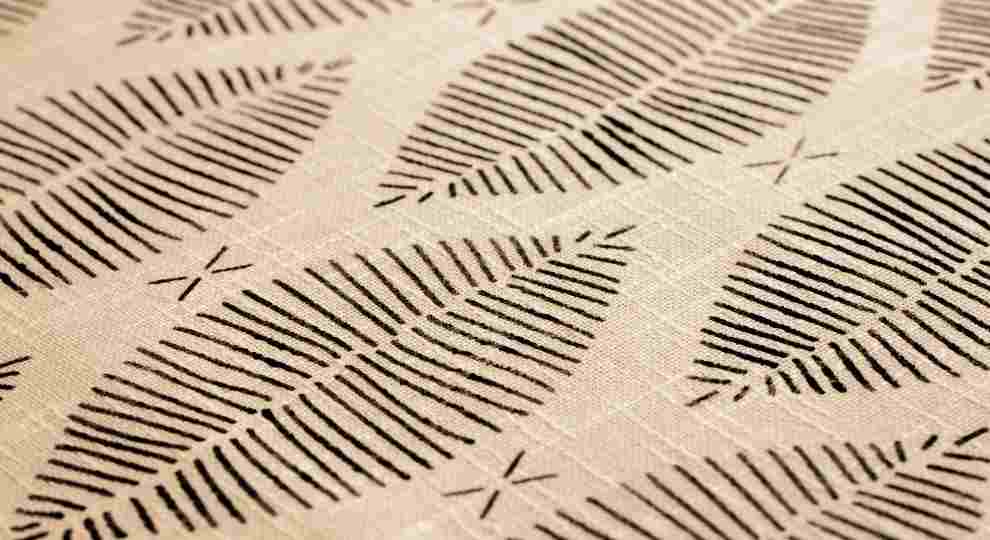
Since I used a loose weave fabric, it was pretty uneven in a few areas.
Therefore, when the stencil could not line up, I used a small artist’s brush and just drew in the lines.
Here’s a close-up of an area that I drew in a few lines. You can’t even tell!
Of course, you will want your results to last; therefore, I would highly recommend this final step.
Make Your Custom Shower Curtain Last
My final step was to iron my shower curtain on a high setting for 3-4 minutes per area. I used parchment paper in between.
This helps melt the acrylic paint into the fabric for permanent results, as we don’t want our design to get ruined when it becomes wet.
Side note, before ironing, I was able to feel the paint on the surface of the fabric when running my hand over the design. Once the iron heated the paint, it was smooth to the touch.
Our ultimate solution to keep your home organized.
In Conclusion
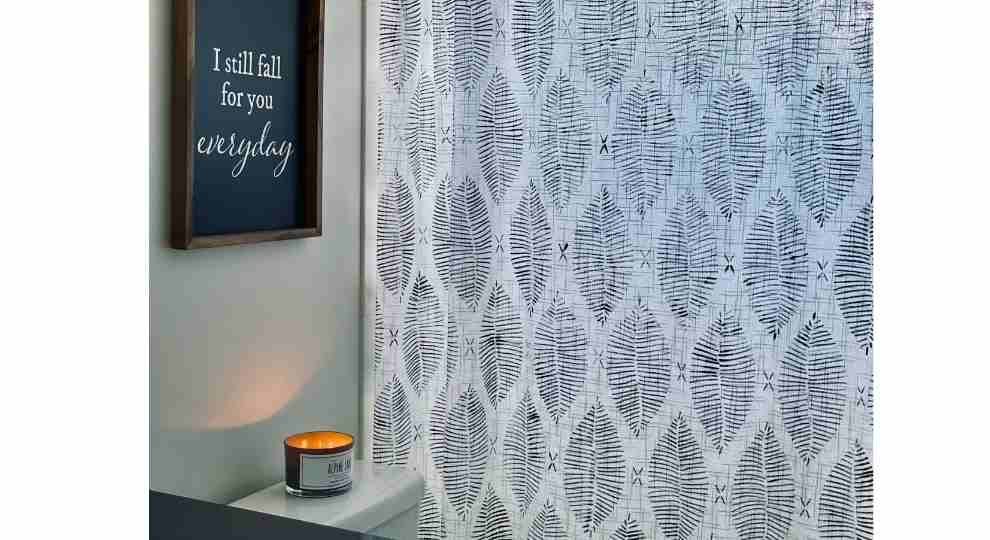
A custom shower curtain is an easy DIY project that can spruce up your bathroom within a few hours. Lastly, stenciling on fabric allows you to have complete control over your vision and is an inexpensive way to add a little luxury to any bathroom.
Lastly, for home-related tips and tricks drop by anytime. In the meantime, you may enjoy learning ow to make DIY Marble Mugs.