How To Make Wedding Invitations On Microsoft Publisher
Create Your Own Invitations
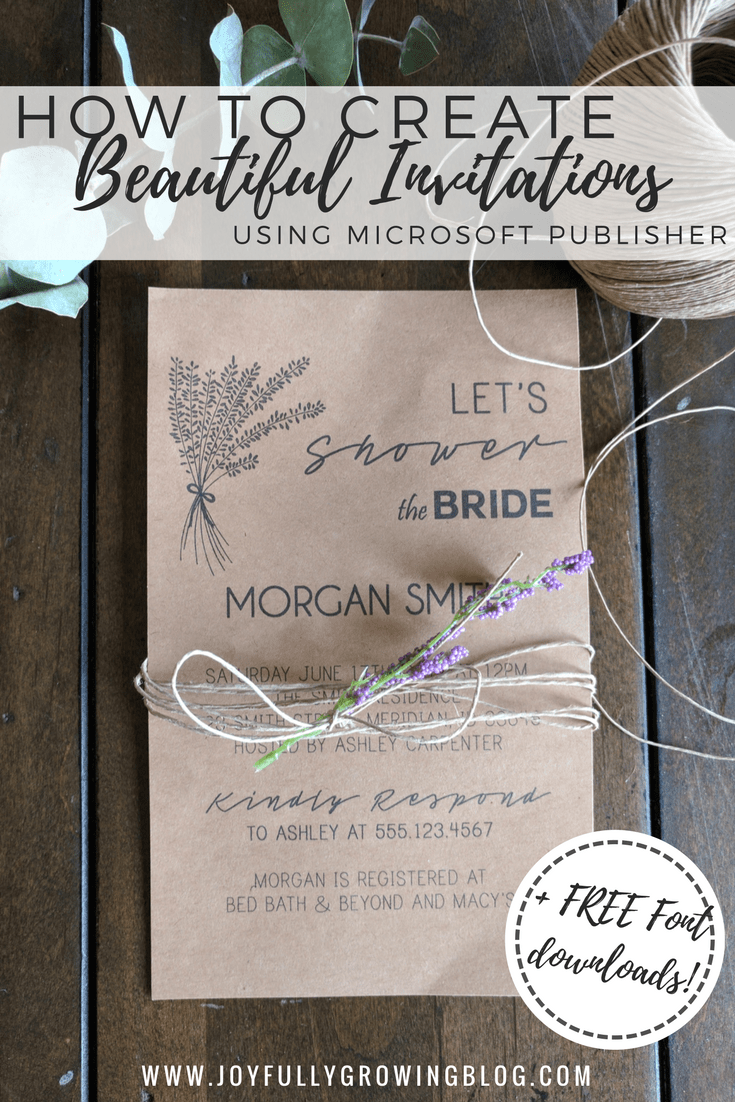
Follow this tutorial to create your own invitations. They are perfect for wedding, or bridal shower invites! Grab the free font downloads and start creating beautiful invitations for your special event in no time!
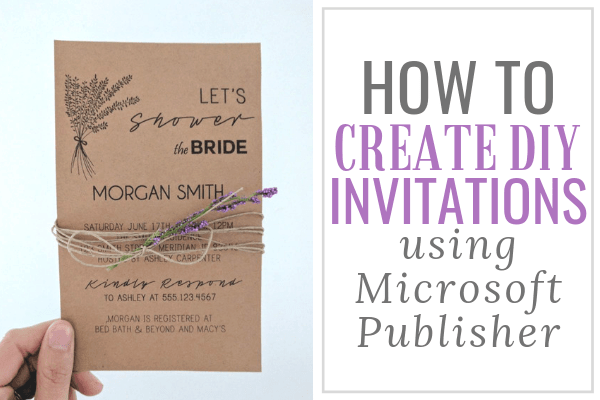
I love browsing through all of the pretty wedding invitation designs available for purchase on Pinterest and Etsy, but I feel like it’s extra special if I can create my own.
This site uses ads and affiliate content as an Amazon associate earning on qualifying purchases. Disclosure.
It’s the personal touch that makes all the difference! Not to mention, it’s a real cost-saver. #yesplease
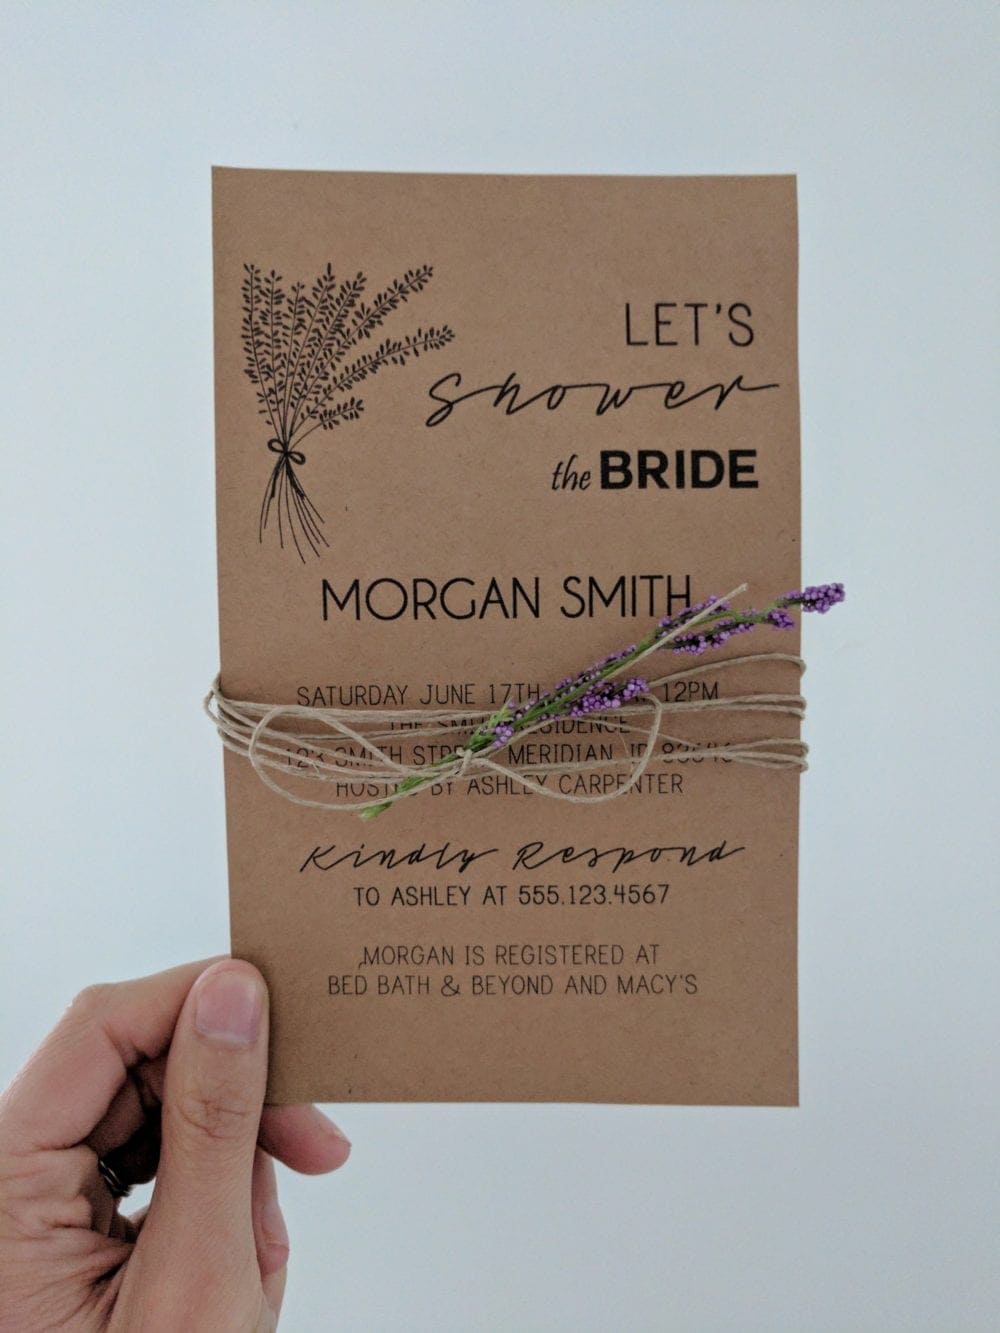
Plus, once you’re a master at creating your own design, you have the freedom to customize it for any event in the future! It’s really a win-win :)I had the honor of hosting my sister’s bridal shower and had so much fun creating these custom invitations for her special day. (I also used this same method for creating her wedding invitations!)
I like to use Microsoft Publisher to make DIY invitations because it is simple to use and is included with most Microsoft Office packages.
Here are the exact steps I used to create these bridal shower invitations for my sister’s wedding!
How To Make Wedding Invitations – Tutorial
Step 1: Choose the size of your card
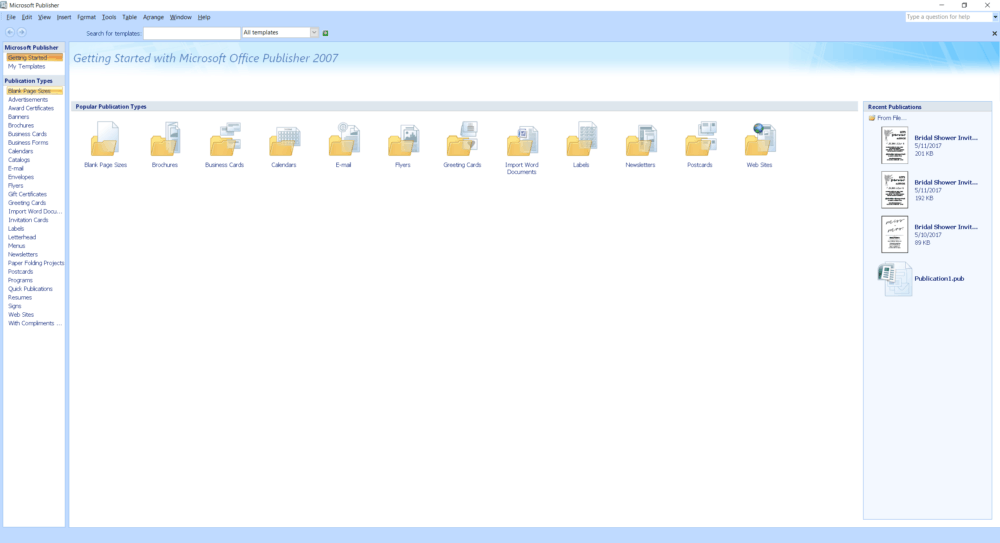
When you open Microsoft Publisher you should see this:
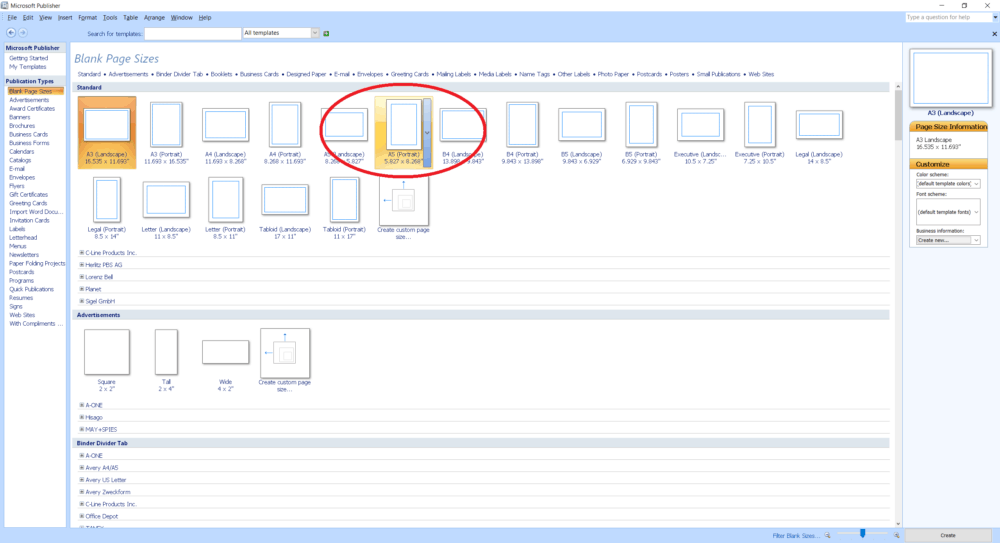
Select ‘Blank Page Sizes’ and then choose your desired card size. I used A5 (Portrait).
Step 2: Start with your text
Once your document is open, begin by adding a text box. To do this, click on ‘Insert’ and then select ‘Text Box’
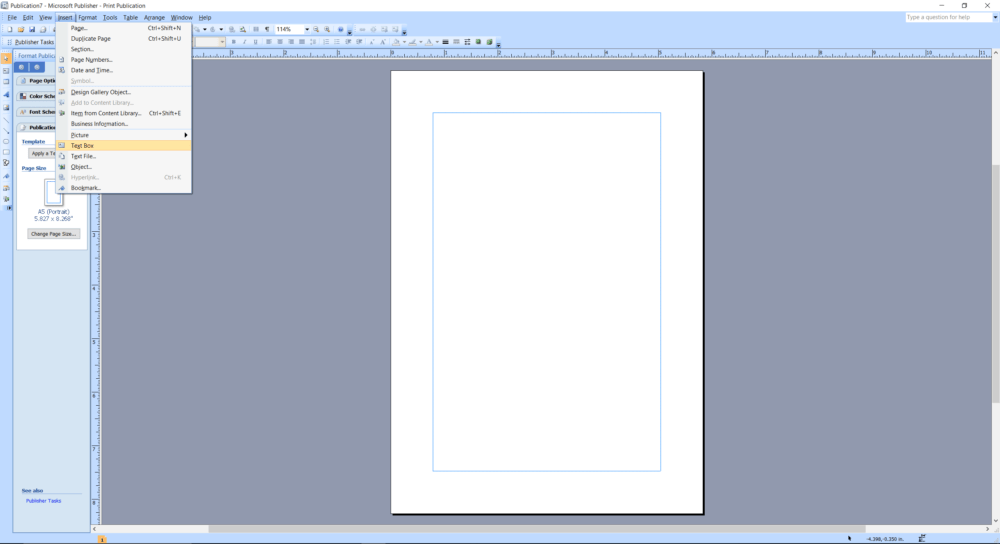
Resize and position the text box in the area in which you want to add your text. You will probably be adding multiple text boxes depending on the different amounts of text you want to include on your card.
Once your text box is where you want it, enter your desired text. Play around with different fonts and sizes to come up with a look that you like.
How To Download Custom Fonts In Publisher
One way I love to add even more customization is by downloading unique fonts using www.dafont.com. They have tons of different styles to choose from that are FREE!
It’s really simple to use – just follow these quick steps:
- Go to www.dafont.com and select the font you like
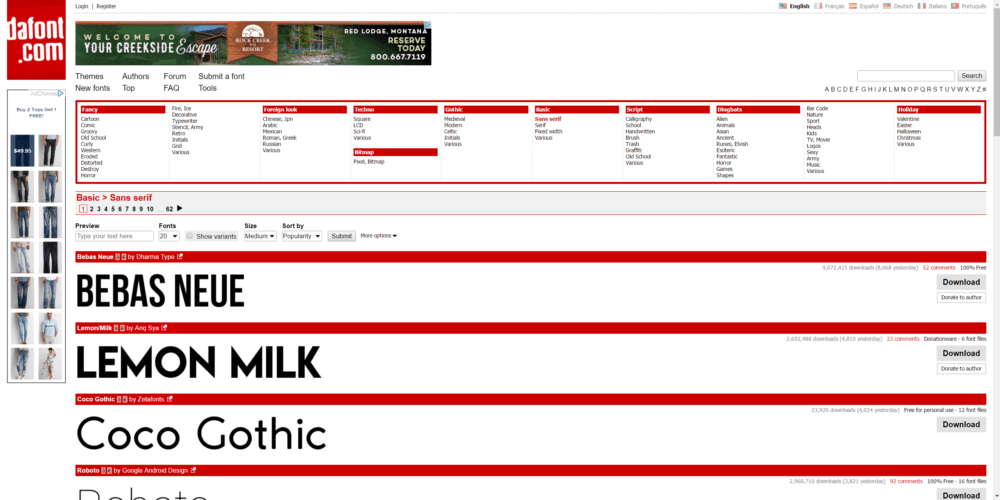
- Once you’ve decided on a font, click on ‘Download’
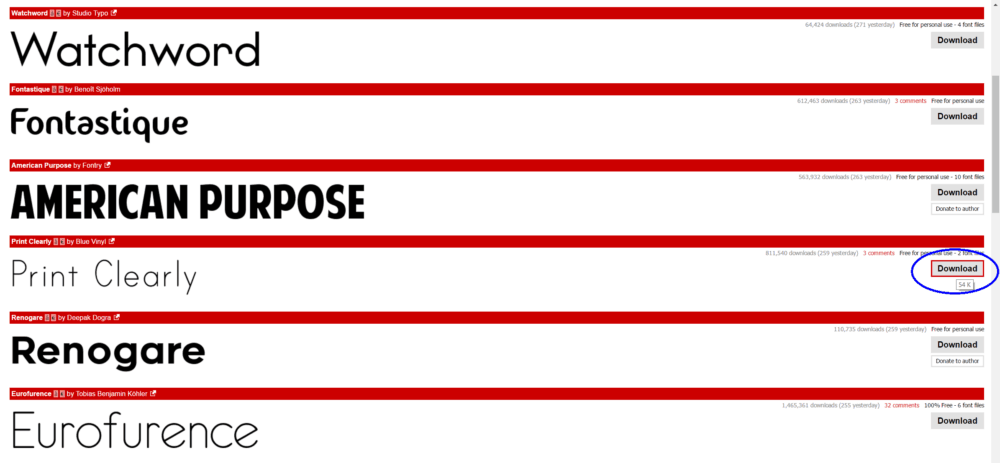
- When the file finishes downloading, open in new window (it should look something like this):
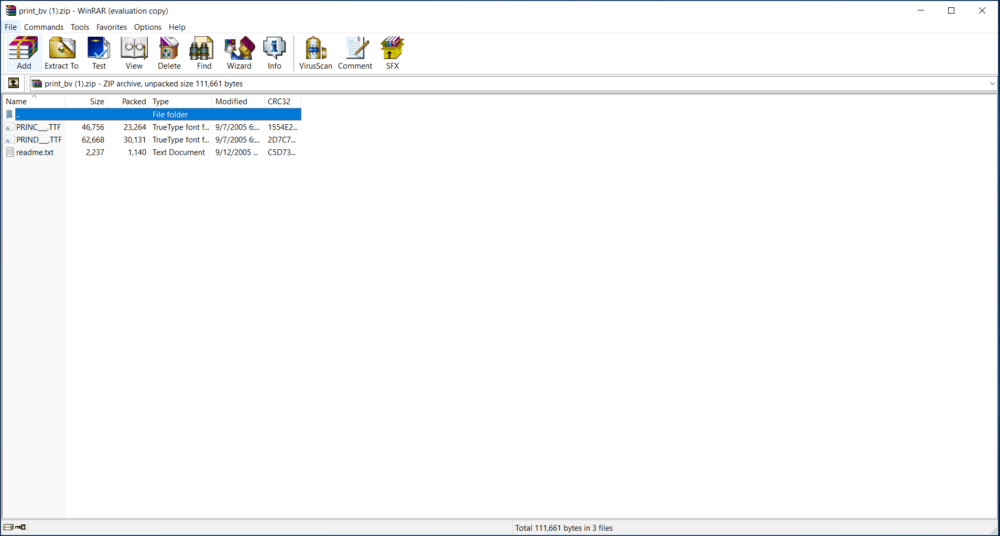
- Double click on the first file and it will open a window displaying your selected font
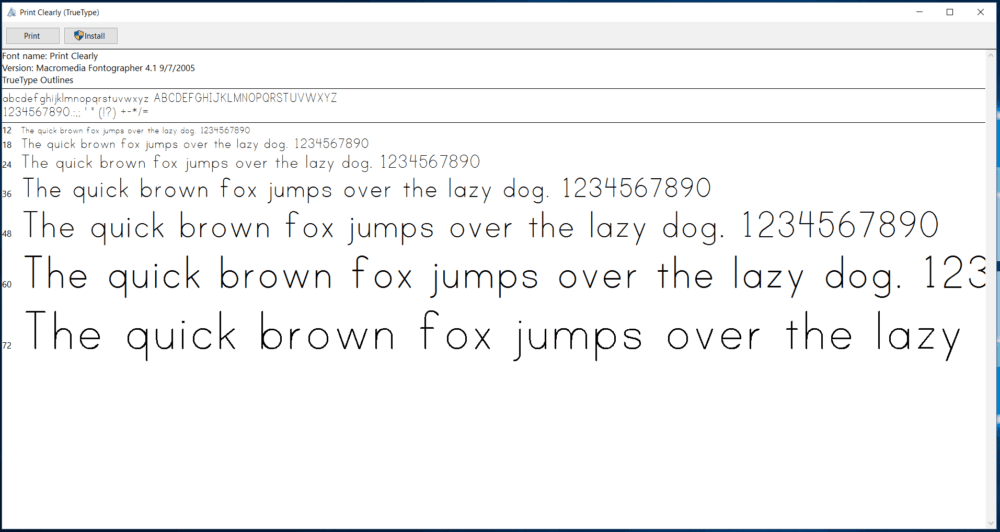
- Click the ‘Install’ button at the top. Once the installation finishes, the font should be available in the drop down font menu within all of your Microsoft Office programs

You can download/install as many different fonts as you want to mix up the look of your card. I love mixing a clean crisp font with a handwritten script look.
Here’s what my card looked like after adding two different text boxes as well as combining 5 different fonts (specific names and event details have been changed for privacy reasons 😉 )
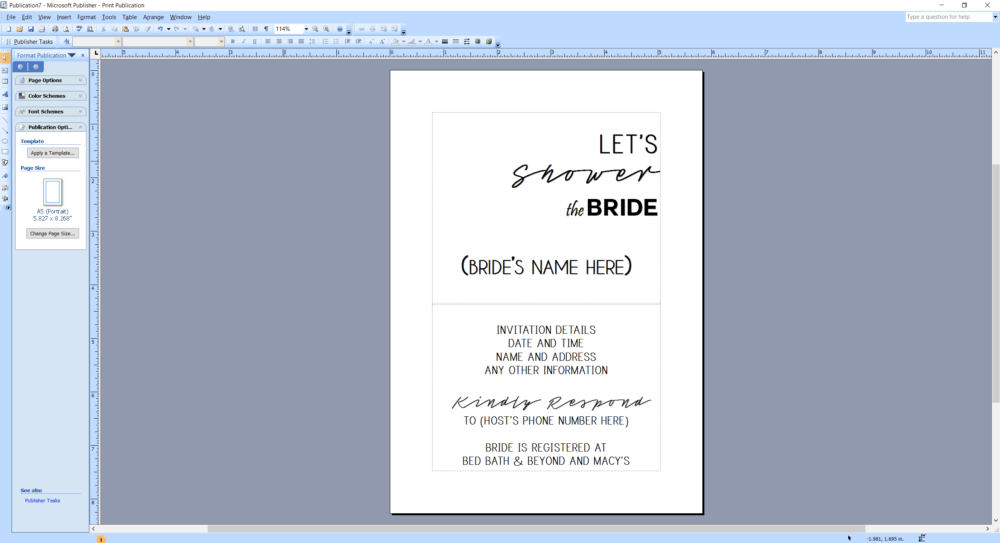
Here is a breakdown of the 5 different fonts I used:
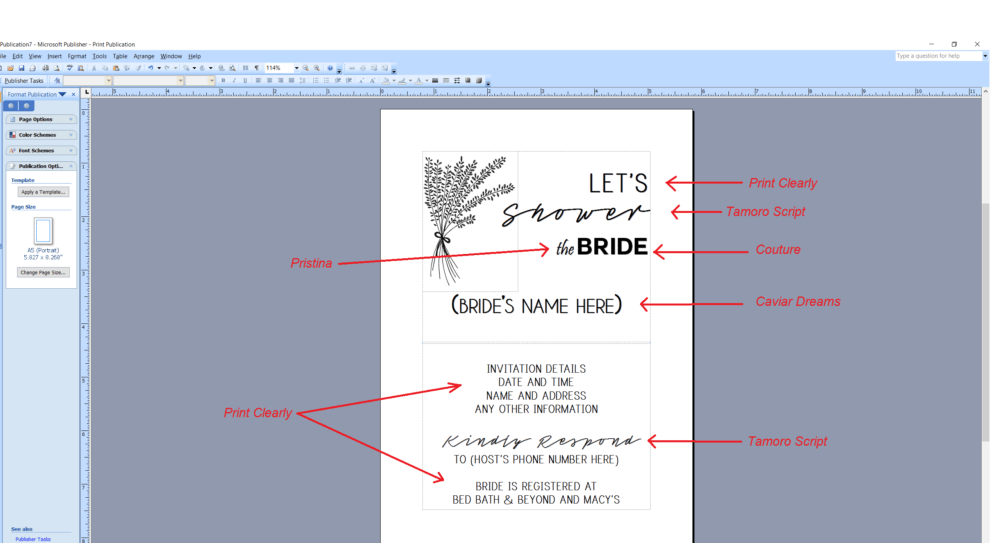
To get these fonts for yourself just click on the appropriate links below:
- Print Clearly
- Tamoro Script
- Pristina (no need to download, this comes standard with Microsoft Office 🙂 )
- Couture
- Caviar Dreams
RELATED: 5 Simple Tips for Spring Entertaining
Step 3: Add an image
Select ‘Insert’ and hover over ‘Picture’ and select either ‘Clip Art’ or ‘From File’ to add any saved image to your card
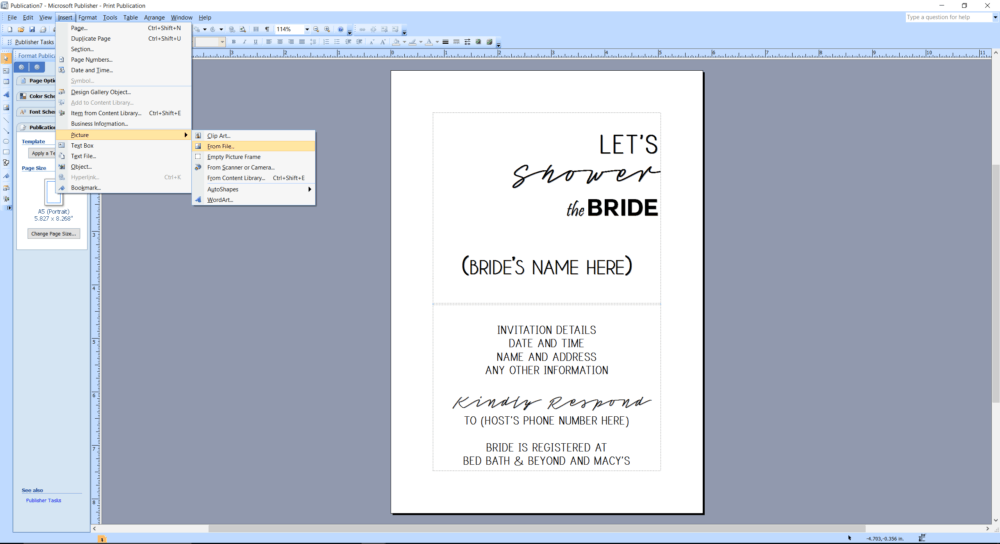
When the image imports to your document, it will disrupt the way your text is formatted (see below), but this is an easy fix.
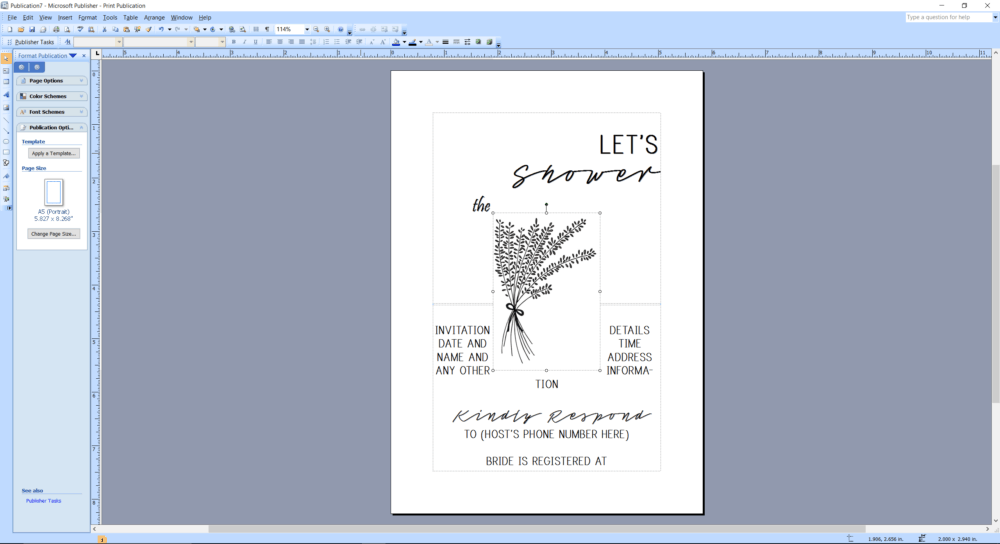
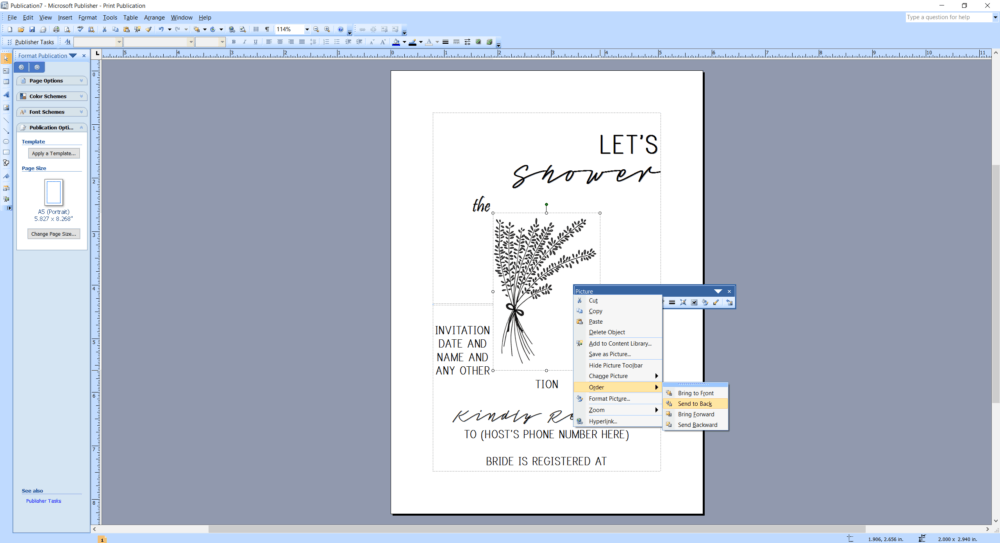
Right click on the image, hover over the word ‘Order’ and select ‘Send to Back’
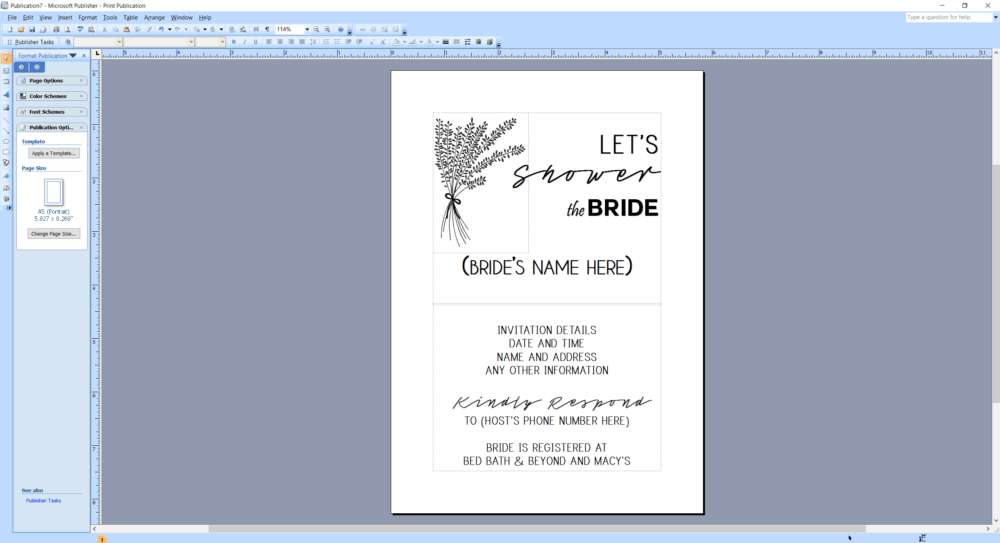
This will allow the text to return to your original layout and make it so that your image can be freely moved around without disrupting the overall look of your card. From here you can position the image wherever you like, as well as resize it using the little circles on the sides/corners.
Step 4: Print Settings
Once you are happy with how your card looks, it’s time to print! You most likely chose a card size that is smaller than an 8.5″ x 11″ piece of paper, so make sure to follow the steps below to duplicate your design and make the most out of one sheet of paper.
Select ‘File’ and click on ‘Print Setup’. Click on the drop down arrow where it says ‘Size’ and select ‘A4’. Then change the orientation to ‘Landscape’. After those two changes, you should see the option to select ‘Multiple copies per sheet’. Select this option.
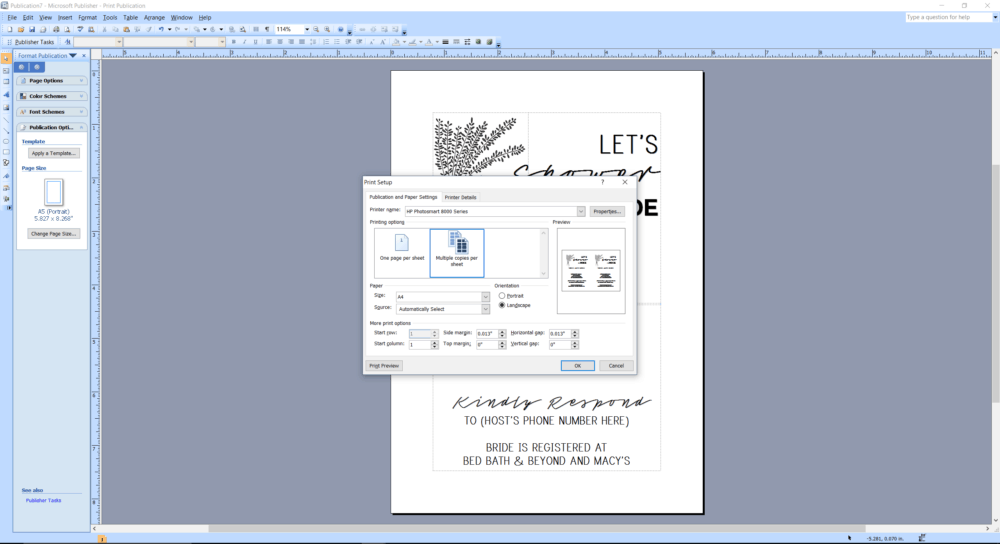
Next, select ‘File’ and click on ‘Print Preview’, it should look something like this (or more if your card was a smaller size):
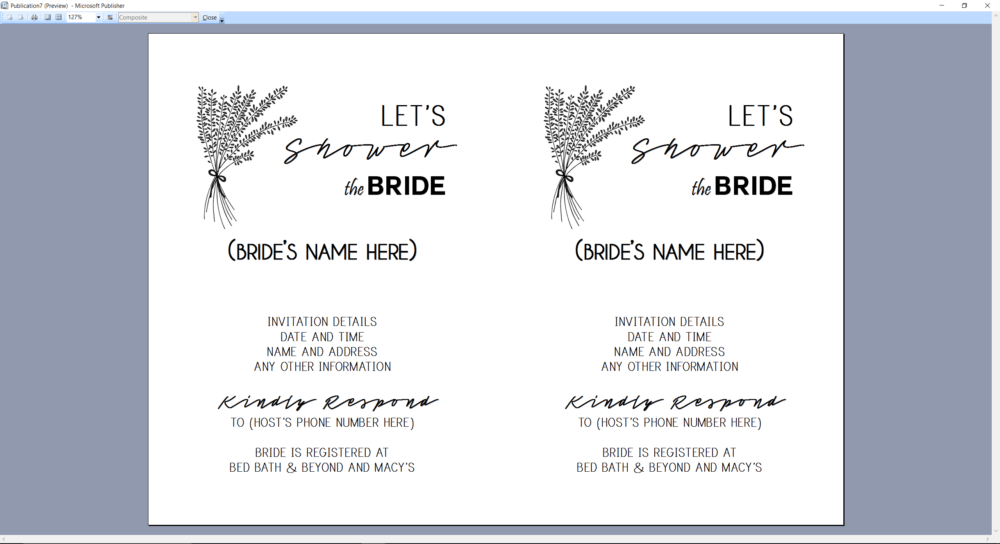
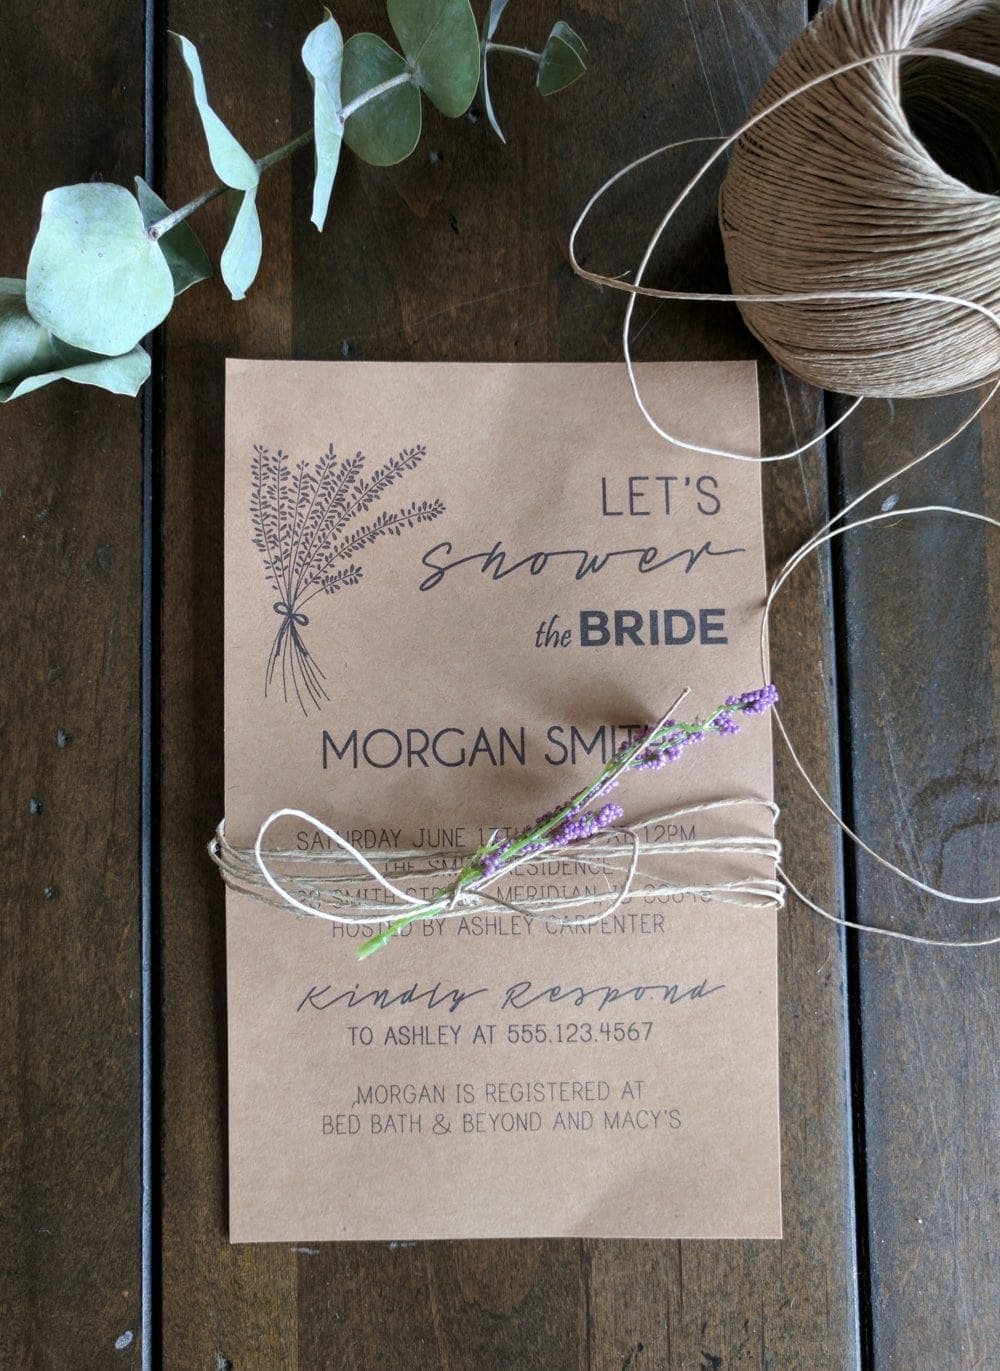
If everything looks good, hit ‘Print’ and do a little happy dance because you just created your own beautiful invitation! (I like to use Kraft paper to give it a rustic look, but any card stock paper would look great!)
Just add a little twine and some dried flowers to give it that finished look, and you’re all set!
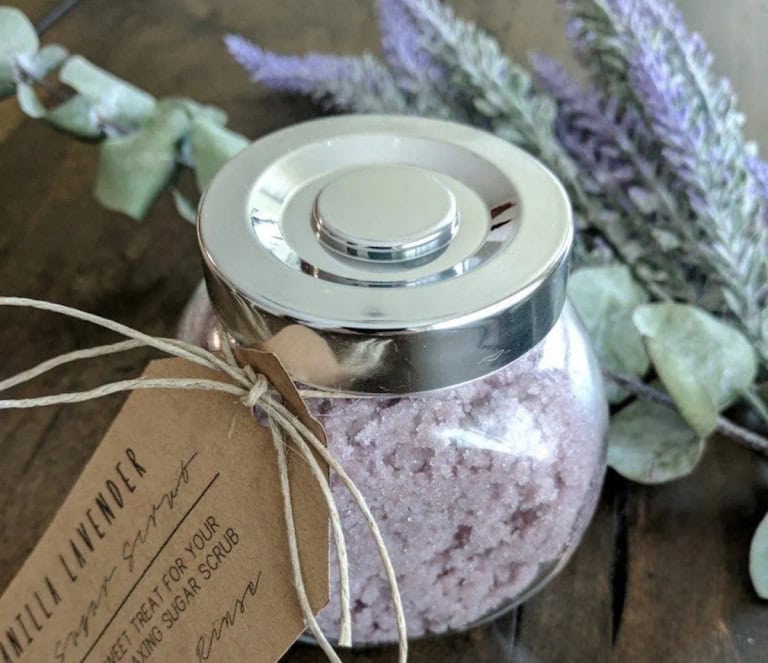
Looking for more wedding DIYs? In this post I share how to make sugar scrub favors in under 5 minutes! Your guests will love them!
For more DIY tutorials, head here!
Microsoft Publisher Wedding Invitations



Thank you so much for these instructions! They saved me. Instead of getting new fonts, I used the following font conversion with fonts already available from MicroSoft Publisher.
Print Clearly – Felix Titling (font Size 22)
Tamoro Script – Segoe Script (font size 36)
Couture – Calibri (font size 36)
Caviar Dreams – Vladimir Script (font size 72)
Oh cool! Thanks for pointing that out, I love that you were able to find conversions! So glad this tutorial helped you!
This was really helpful,
Thanks you! X
Oh I’m so glad! You’re so welcome, Amanda!
Hi
I love these and would like to do something similar for my ‘Save the Dates’. I’m trying to find a similar picture to yours with a clear background to print on Kraft card but have be unsuccessful so far. Where would you suggest looking?
Hi Libby! I usually find my images on google. So for instance you could search for black and white lavender clipart with transparent background free download. You’ll have to make sure you are downloading it from a site that allows free downloads so you aren’t violating copyrights. But that’s where I would start. You can also always remove the background in publisher. All you have to do is upload the image to publisher, and select ‘recolor’ and then ‘set transparent color’ and click on the background.
Hopefully that helps!
Dear Ashley,
i love your idea and I would like to try to make my own wedding invitations.
I love also the picture of the lavender. But I cannot find it. Could you please resend me the source of the picture? thank you very very much
Zuzana
Congrats on the wedding! Unfortunately I do not have the original source, but if you google “black and white lavender clip art free download” there are a lot of really similar options!
great tutorial ashley! Wish I would have had this when I got married. Maybe I’ll save for my sister 😉
Yes it is so handy to be able to create your own instead of ordering! I use Publisher for so many things 🙂 Glad you enjoyed it!